| Navigation: User's Guide and Tutorials > Getting Started with Clarion! >====== Exercise Four - Add a Lookup File ====== |    |
In this lesson, we will now look at “fine tuning” the dictionary in the Dictionary Editor. This will directly affect how our application will be generated in Lesson Eight.
1.Highlight the Customer table and examine the Fields list. You should notice a State column. In the next sequence of steps, we will create a lookup table to allow a user to select from a list of valid state abbreviations. After that, we will “notify” the state column that a lookup is active.
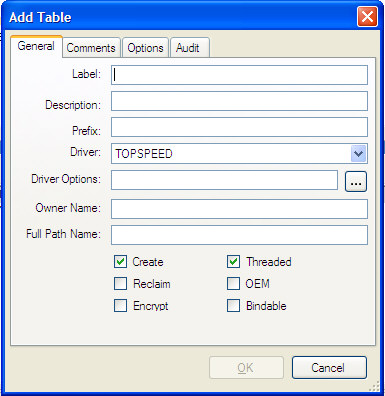
2.In the DCT Explorer, highlight the Tables entry, and press the Add Table  button, located in the DCT Explorer toolbar.
3.In the Label entry, enter States in it, and then press the TAB key.
4.Press the TAB key again to accept Sta as the Prefix.
Next, you are prompted to choose a Table Driver.
5.Verify or select TOPSPEED from the Driver drop list, and press the TAB key.
6.Press the OK button to complete the new Table.
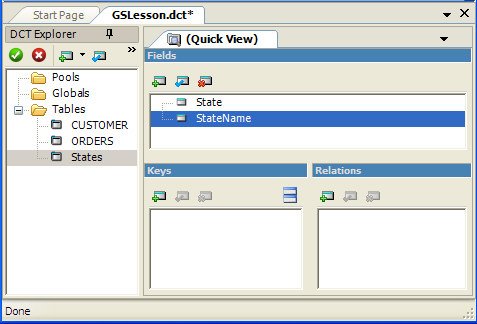
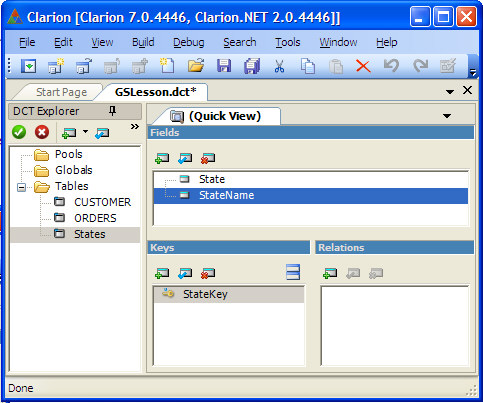
7.In the Fields Quick View pad, press the Add  button, located in the toolbar.
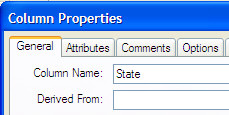
8.Type State in the first row of` the Column Name entry, and press the TAB key.
This creates a column named State. This column is the link to the State column in the Customer table. Using the same column names makes it easier to link the two tables in a relationship. In the generated Clarion code, adding the table's prefix to column labels (separated by a colon) creates unique names for columns with the same name in separate tables. Therefore, this column will actually be called STA:State, while the column in the Customer table is called CUS:State.
Clarion also fully supports a naming convention called Field Qualification Syntax. The prefix format above (STA:State) can also be represented as States.State (file label.field label).
9.In the Characters entry, type 2, or use the spin control, and press the TAB key.
10.Accept all other defaults, and press the OK button to complete the new column.
At this time another Column Properties dialog opens allowing you to enter a second column.
11.In the Column Name column, type StateName, and then press the TAB key.
12.In the Characters column, type 30, then press the OK button to complete this column.
13.At this time another Column Properties dialog opens allowing you to enter a third column. We are finished with this table's columns, so press the Cancel button to exit this dialog.
14.Next locate the Keys Pad, and press the Add  button, located in the toolbar.
15.In the Label column, Type StateKey.
16.In the Attributes group, check the Require Unique Value check box.
This specifies a key that does not allow duplicate entries, enabling you to have a unique state reference file for your customers. This allows us to create a Many to One relationship between the two tables (Many Customers live in one State).
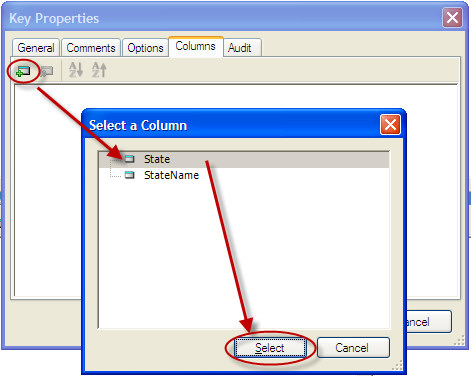
17.Click on the Columns tab, and press the Add  button, located in the toolbar. In the Select a Column dialog, highlight State and press select as shown below:
18.Press Cancel in the Select a Column dialog to close this window, and press the OK button to save this key. Finally, press Cancel again in the Key Properties dialog to stop adding additional keys and return to the main Dictionary IDE.
19.Press the Save button  in the IDE toolbar at this time to save your work, and stay in the Dictionary Editor.

