| Navigation: User's Guide and Tutorials > The Application >====== Lesson 3 - The Application Generator Environment ====== |    |
This chapter is important for understanding the general development flow of a typical application, and how your environment settings can affect your design environment.
Overview: Developing Your Application
Once the .APP file exists, you develop your application through a series of dialogs. When you create your application's menus and toolbars, they call procedures that you name. The Application Generator adds these “ToDo” procedures to the application tree. You define the functionality of the “ToDo” procedures by picking from a set of Procedure templates.
Remember, templates are code generation scripts that prompt you for information on how to customize the generated code. Use the Window and Report Designers to supply information to the templates about how your application looks to the end user.
Following is an overview illustrating the tasks that you normally complete when building an application with the Application Generator. The lessons in this help document that follow provide a more detailed description.
·Define the “Main” procedure.
Add menu commands and their “ToDo” procedures.
·Define the “ToDo” procedures.
Choose the appropriate template to generate each procedure.
Use the Procedure Properties dialog to identify the procedure's source file.
Use the Window Designer to design your windows.
Use the Report Designer to design your reports.
Use the Procedure Properties dialog to add local variables as needed.
·Make the application (generate source code, compile, and link).
·Incrementally test the application (run it).
Define the Main Procedure
In the Application Tree dialog, highlight the Main “ToDo” procedure, then press the Properties button  to access the Select Procedure Type dialog. This lists the Procedure templates and template defaults available in the Template Registry.
From the Defaults tab of the Select Procedure Type dialog, select the Default MDI Frame default procedure type for Main, and then press the Select button.
The Frame procedure template is usually the best starting point for a typical application which employs different MDI child windows to present data in different views and forms. The Frame procedure template contains an MDI application frame, which already includes fully functional standard windows menus like File, Edit and Help. This menu will be discussed in more detail in a later lesson (See Exploring the Menu Frame Procedure ).
Also in the Select Procedure Type dialog, you can choose the Wizard tab to use one of the various wizards to build your procedure.
To build a new procedure that is between a wizard built procedure and the templates, choose the Defaults tab. This lists procedures that are nearly complete.
Choose the Template tab when you wish to add your own controls, control and extension templates. This is ideal for designs that require the most customization. It places minimal controls on the procedure.
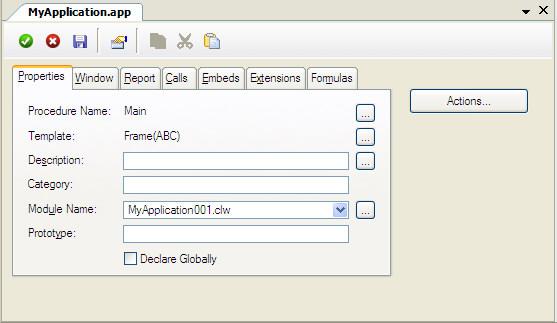
After you make your selection, the procedure's Properties tab dialog appears.
Each Procedure template contains defaults or starting points for such elements as the window, a basic menu structure, reports and more. These defaults are designed with real world uses in mind, such as update forms (a window that displays a single record) for updating a database record. When developing an application, you can customize these procedures to fit your needs.
Add Menu Commands and Their “ToDo” Procedures
In the Properties tab dialog, access the Window Designer by pressing the Window tab, and then pressing the Designer button. You can also access the Window Designer directly from the application tree, and that method is more commonly used by developers.
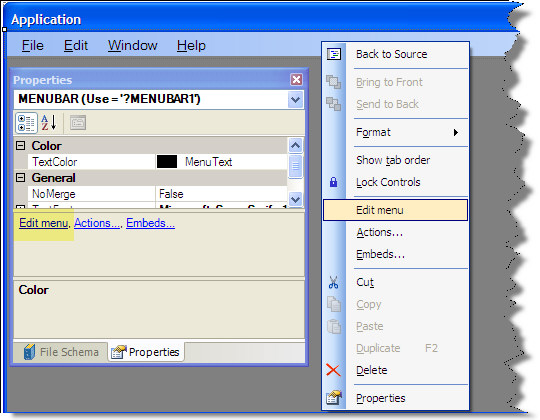
When the Window Designer dialog appears, go directly to the Menu Editor: the best way is to simply right-click on the Menu, and select Edit Menu from the popup menu. The Menu Editor dialog appears. You can also select the Edit Menu link located in the Properties Pad.
See Exploring the Menu Frame Procedure for details on editing the menu.
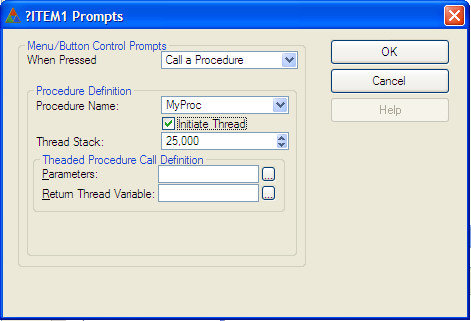
Typically, you add a menu item by pressing the Add New Item (Insert)  button. Then, right-click on the item that you just added, select the Actions item from the popup menu to specify the procedure or program to execute when the end user chooses that menu item. Once you type in the procedure name, the Application Generator adds the procedure to the Application Tree as a “To Do.”
When creating a Multiple Document Interface (MDI) application, check the Initiate Thread box when prompted.
Press the OK button to close the Actions dialog, and then press the Save and Close button  to close the Menu Editor, saving your changes. Press
  to exit the Window Designer and save your changes. Press the Save and Close button again in the Window Designer Editor to return to the Application Tree.
Define the “ToDo” Procedures
Select the first “ToDo” procedure in the Application Tree and press the Properties  button. The “ToDo” items are the procedure or procedures you named with the Menu Editor.
Choose the Appropriate Template to Generate each Procedure
Select a Procedure type from the choice of three tabs, then select the procedure from the Procedure Type dialog, then press Select. At this point, you might choose, for example, a Browse template, which displays records in a list box.
If you use the Wizards, one of the many procedure wizards prompts you for the information needed to complete your procedure (or procedures).
Choose the Tables that the Procedure Uses
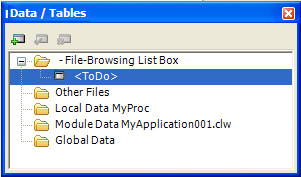
The Data / Tables Pad (FSP) is a special pad that displays the contents of an active dictionary and other application data elements (Global, Module, and Local). This pad is available when either the Dictionary Editor or Application Generator is opened. Open or bring focus to the Data / Tables Pad by pressing the F12 Key.
Based on the template procedure that you selected, you should see a <;To Do> entry. Highlight the <;To Do> entry, and press the Add button on the Pad toolbar.
Add local variables
In the Data / Tables Pad, highlight the Local Data folder, and press the Add button on the Pad toolbar.. Basically, you declare each variable same way you define a column in a table.
Use the Window Designer to design your windows
In the Application Tree, highlight the target procedure and press the Window button. The Window Designer displays a sample window. See the Window Designer lesson for more detailed information. Depending on the Procedure template you chose, the window may already contain some predefined controls.
Everything that appears in the window is a control, including buttons, list boxes, check boxes, spin boxes, data entry fields, etc. Select a control, then open or select the Properties Pad to specify the appearance and behavior of the control.
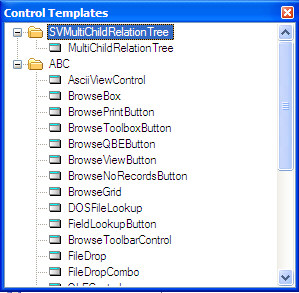
Use the Control Templates Pad to place “prefabricated” controls'fully functional controls with associated source code. See the Adding Templates lesson for more information. For example, a BrowseBox control template generates a list control with associated source code that loads and scrolls the list.
Use dictionary columns (Window Designer  Populate
  Column) to place “some assembly required” controls, that is, entry controls that are automatically loaded with a data dictionary column or memory variable values.
Use simple controls (View  Control Toolbox) to place “do-it-yourself” controls, that is, controls with no associated source code. See the lesson on the Window Designer for more information.
Make the Application
Press the  button on the toolbar to generate source code, compile, and link the application. The Application Generator automatically maintains the compile and link information for the application.
Test the Application
Press the  button on the toolbar or choose the Make and Run All menu item from the Debug IDE Menu.
After testing your first procedure, you can add more procedures, embed custom source code, and otherwise add functionality to your application.
Configuring the Application Generator
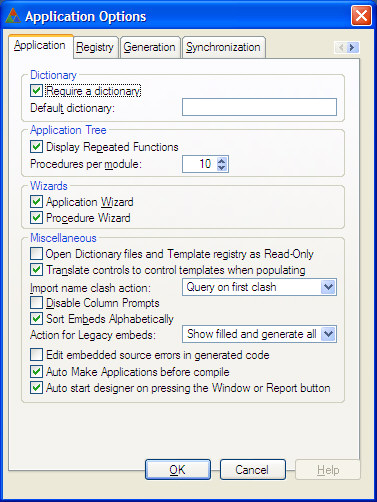
The Application Options dialog lets you specify default settings for each new application you create as well as for the active application. To access the dialog, choose Tools  Application Options. The dialog is divided into seven sections or tabs: Application, Registry, Generation, Synchronization, Embed Editor, OOP Embed Tree Options and Embed Tree Options.


